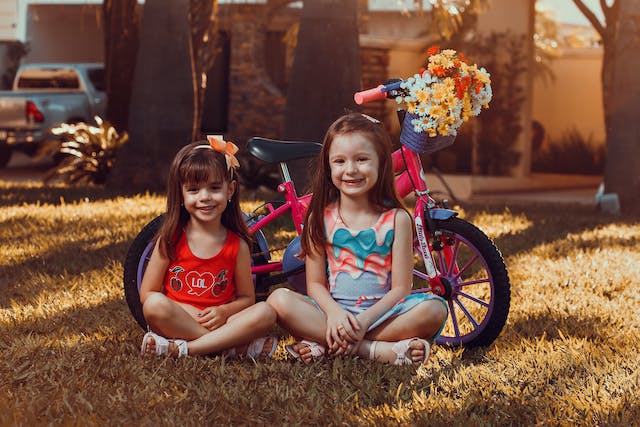
10 DIY Accessories to Make Your Kids\’ Outfits Pop!
DIY accessories for kids’ outfits are a fun and rewarding activity for parents and children alike. Not only do they allow you to add a personal touch to your child’s wardrobe, but they also provide an opportunity for creativity and bonding. Whether you’re making a fabric flower headband or a personalized backpack charm, creating handmade accessories can be a great way to spend quality time with your child while also teaching them valuable skills.
Make Your Kids\’ Outfits Pop
The Benefits of Creating Handmade Accessories for Your Children
There are several advantages to making your own accessories for your children. One of the main benefits is cost-effectiveness. Buying accessories from stores can be expensive, especially when you consider that children often lose or outgrow them quickly. By making your own accessories, you can save money and have the satisfaction of knowing that you created something unique.
Another advantage of DIY accessories is customization. When you make your own accessories, you have complete control over the design and materials used. This allows you to create pieces that perfectly match your child’s personality and style. Whether they love bright colors or prefer more subtle designs, you can tailor the accessories to their preferences.
In addition to cost-effectiveness and customization, handmade accessories also hold sentimental value. When you create something with your own hands, it becomes more than just an accessory – it becomes a cherished keepsake. Your child will appreciate the effort and love that went into making the accessory, and it will hold special meaning for both of you.
How to Choose the Right Materials for Your DIY Project
When choosing materials for your DIY project, there are a few factors to consider. First, think about the age of your child. For younger children, it’s important to choose materials that are safe and non-toxic. Avoid small parts that could be a choking hazard and opt for child-friendly materials such as fabric, felt, or plastic beads.
Next, consider your child’s preferences. Do they have a favorite color or pattern? Incorporating their favorite colors or themes into the accessories will make them even more special to your child. You can also involve your child in the material selection process by taking them to a craft store and letting them choose their own fabrics or beads.
Lastly, think about durability. Children can be rough on their accessories, so it’s important to choose materials that can withstand wear and tear. Look for sturdy fabrics and strong adhesives that will hold up over time. If you’re sewing the accessories, consider reinforcing the seams to ensure they don’t come apart easily.
10 DIY Accessories Ideas for Your Kids’ Outfits
1. Fabric Flower Headband: This is a classic accessory that can be customized with different fabrics and colors. It’s perfect for girls of all ages and can be made using simple sewing techniques or fabric glue.
2. Pom-Pom Earrings: These fun and colorful earrings are a great way to add a pop of color to any outfit. They can be made using pom-poms, beads, and earring hooks.
3. Statement Necklace: Create a statement necklace using beads and ribbon. This accessory is perfect for older children who want to make a bold fashion statement.
4. Personalized Backpack Charm: Make a backpack charm using charms, beads, and ribbon. This accessory not only adds a personal touch to your child’s backpack but also helps them easily identify their bag.
5. Fabric Bow Tie: For your little gentleman, create a fabric bow tie using fabric and elastic. This accessory is perfect for special occasions or just for adding a touch of style to everyday outfits.
6. Hair Clip with Felt and Buttons: Make a cute hair clip using felt and buttons. This accessory is easy to make and can be customized with different colors and shapes.
7. Friendship Bracelets: Teach your child how to make friendship bracelets using embroidery floss. This classic accessory is perfect for both boys and girls and can be made in a variety of patterns.
8. Keychain: Create a keychain using beads, charms, and a keyring. This accessory is not only practical but also allows your child to show off their creativity.
9. Fabric Scrunchies: Make fabric scrunchies using elastic and fabric. These accessories are perfect for keeping hair out of your child’s face and can be made in a variety of colors and patterns.
10. Shoe Charms: Personalize your child’s shoes with shoe charms. These accessories can be attached to the laces or Velcro straps and come in a variety of fun shapes and designs.
How to Make a Fabric Flower Headband
To make a fabric flower headband, you will need the following materials:
– Fabric of your choice
– Scissors
– Needle and thread or fabric glue
– Elastic or headband
1. Start by cutting out several circles from your fabric. The size of the circles will determine the size of your flowers, so you can make them as big or as small as you like.
2. Take one circle and fold it in half, then fold it in half again to create a smaller triangle shape.
3. Thread your needle and knot the end, or apply fabric glue to one corner of the triangle.
4. Starting from the pointed end of the triangle, begin folding the fabric in small pleats, securing each pleat with a stitch or a dab of fabric glue.
5. Continue folding until you reach the end of the triangle, then secure the pleats with a final stitch or dab of glue.
6. Repeat steps 2-5 with the remaining circles to create multiple flowers.
7. Once all the flowers are complete, attach them to an elastic or headband using needle and thread or fabric glue.
8. Allow the glue to dry or secure the stitches, and your fabric flower headband is ready to wear!
DIY Pom-Pom Earrings for Your Little Girl
To make pom-pom earrings, you will need the following materials:
– Pom-poms in various colors
– Earring hooks
– Jump rings
– Pliers
1. Start by selecting the pom-poms you want to use for your earrings. You can choose one color or mix and match different colors for a fun and vibrant look.
2. Using pliers, open a jump ring by twisting it sideways. Slide one end of the jump ring through the loop of an earring hook.
3. Thread a pom-pom onto the jump ring, then close the jump ring using the pliers.
4. Repeat steps 2-3 to attach a pom-pom to the other earring hook.
5. Once both pom-poms are attached, your earrings are ready to wear!
Making a Statement Necklace with Beads and Ribbon
To make a statement necklace, you will need the following materials:
– Beads in various shapes and colors
– Ribbon or cord
– Jump rings
– Clasp
– Pliers
1. Start by selecting the beads you want to use for your necklace. You can choose beads in different shapes, sizes, and colors to create a unique design.
2. Cut a length of ribbon or cord that is long enough to fit comfortably around your child’s neck.
3. Using pliers, open a jump ring by twisting it sideways. Slide one end of the ribbon or cord through the jump ring, then close the jump ring using the pliers.
4. Thread beads onto the ribbon or cord in your desired pattern and arrangement.
5. Once all the beads are threaded, attach a clasp to the other end of the ribbon or cord using a jump ring and pliers.
6. Your statement necklace is now ready to wear!
Creating a Personalized Backpack Charm
To create a personalized backpack charm, you will need the following materials:
– Charms in various shapes and designs
– Beads
– Ribbon or cord
– Jump rings
– Keyring
– Pliers
1. Start by selecting the charms and beads you want to use for your backpack charm. You can choose charms that represent your child’s interests or hobbies.
2. Cut a length of ribbon or cord that is long enough to attach the charms and beads.
3. Using pliers, open a jump ring by twisting it sideways. Slide one end of the ribbon or cord through the jump ring, then close the jump ring using the pliers.
4. Thread charms and beads onto the ribbon or cord in your desired pattern and arrangement.
5. Once all the charms and beads are threaded, attach a keyring to the other end of the ribbon or cord using a jump ring and pliers.
6. Your personalized backpack charm is now ready to attach to your child’s backpack!
DIY Fabric Bow Tie for Your Little Gentleman
To make a fabric bow tie, you will need the following materials:
– Fabric of your choice
– Scissors
– Needle and thread or fabric glue
– Elastic or ribbon
1. Start by cutting out two rectangles from your fabric. The size of the rectangles will determine the size of your bow tie, so you can make them as big or as small as you like.
2. Fold one rectangle in half lengthwise, with the right sides of the fabric facing each other.
3. Sew or glue along the long edge of the rectangle, leaving a small opening in the middle.
4. Turn the rectangle right side out through the opening, then press it flat with an iron.
5. Repeat steps 2-4 with the second rectangle.
6. Take one rectangle and fold it in half widthwise, with the right sides of the fabric facing each other.
7. Sew or glue along the short edge of the rectangle, then turn it right side out and press it flat.
8. Repeat step 7 with the second rectangle.
9. Take one folded rectangle and pinch it in the middle to create a bow shape. Secure the pinch with a stitch or a dab of fabric glue.
10. Repeat step 9 with the second folded rectangle.
11. Attach an elastic or ribbon to the back of one bow using needle and thread or fabric glue.
12. Repeat step 11 with the other bow, making sure to leave enough length on the elastic or ribbon to comfortably fit around your child’s neck.
13. Allow the glue to dry or secure the stitches, and your fabric bow tie is ready to wear!
How to Make a Cute Hair Clip with Felt and Buttons
To make a cute hair clip, you will need the following materials:
– Felt in various colors
– Buttons in various shapes and sizes
– Hair clip
– Scissors
– Needle and thread or fabric glue
1. Start by cutting out shapes from your felt. You can cut out simple shapes like circles, hearts, or stars, or get creative and cut out more intricate designs.
2. Arrange the felt shapes on top of each other to create a layered effect. You can stack them in any order you like, mixing and matching colors and sizes.
3. Once you’re happy with the arrangement, sew or glue the felt shapes together in the center.
4. Attach a button to the center of the felt shapes using needle and thread or fabric glue.
5. Allow the glue to dry or secure the stitches, then attach the hair clip to the back of the felt shapes using needle and thread or fabric glue.
6. Your cute hair clip is now ready to wear!
Conclusion and Final Tips for Successful DIY Accessories Projects
In conclusion, creating DIY accessories for your children’s outfits is a fun and rewarding activity that allows you to add a personal touch to their wardrobe. Whether you’re making a fabric flower headband or a personalized backpack charm, these handmade accessories hold sentimental value and can be cherished keepsakes.
To ensure successful DIY accessories projects, involve your child in the process and let them choose their own materials and designs. This will make the accessories even more special to them and allow them to express their creativity. Additionally, be patient with mistakes and encourage your child to learn from them. Making mistakes is part of the learning process, and it’s important to foster a positive and supportive environment.
So gather your materials, set aside some time, and get ready to create beautiful and unique accessories for your children’s outfits. Not only will you have fun together, but you’ll also create lasting memories and teach valuable skills along the way. Happy crafting!
: Upcycling Tips for Children’s Fashion
Unleash Your Child’s Creativity with DIY Fashion Design!